Post-Press
Post-press is everything that takes place after your pages have been printed on parent sheets. Now your printed sheets will be folded, cut and bound into your final project. In this section we talk about everything which comes after your printing is complete.
Folding Signatures & Collation
Once the printing is complete, the stacks of fully-printed and dried parent sheets are taken to be folded by the folding machine. Each parent sheet zooms through the machine one at a time entering into gates that are set to the proper fold size. A final fold is applied by a heavy arm, called the knife fold, that applies pressure on the fold line. The final project rolls out of the machine as a signature. The majority of projects are folded by these machines, although extremely large projects or those with unique requirements may occasionally be folded by hand.
The folded groups of pages that emerge from the folding machine are called signatures. Most projects have signatures of 16 pages (8 pages on each side of the parent sheet), but projects 6″ x 9″ or smaller may have signatures of 32 pages, and projects larger than 9″ x 12″ may only have 8 pages per signature.
Once all of the parent sheets have been folded into signatures, the stacks of signatures are taken to the collation machine, which collates the separate signatures into their proper page order. The resulting new stacks of ordered signatures are now called book blocks. Most collation machines are large enough to handle books with many hundreds of pages, but books with only two or three signatures can also be collated by hand.

Cover Finish & Customisation
Before your notebook cover can be bound to the book block, any finishes or customisations that weren’t printed during press need to be completed. This includes debossing, foiling and monogramming which are completed during post-press. You can read more about these in the ‘Ways to Customise’ section.

Debossing
Debossing is the most popular and cost effective customisation method as it results in a strong and clear logo and is suitable for all materials, on the front and spines of the books. Your logo is cnc milled onto a brass die, heated and then impressed into the cover of the notebook.

Foiling
Foiling is similar to debossing but adds a luxury aspect to the notebook and allows the logo to stand out even more. Beginning with the same method as debossing, your logo is cnc milled onto a brass die, heated and then a coloured film is placed between the die and the cover, leaving a coloured impression.

Monogramming
The process of adding a monogram is essentially the same as foiling, where you can add individual names or initials to notebooks rather than a corporate logo. The foil is available in gold, silver or white, and creates an elegant and personal finish.
Binding
Binding is one of the most important steps of the whole process, as it has a big impact on both the style and quality of the finished product. Below we give a brief overview of the two most popular types of binding for notebooks and how they fit into this part of the process, but please see the dedicated ‘Binding Methods’ page for more detail.

Saddle Stitched and Sewn Bound
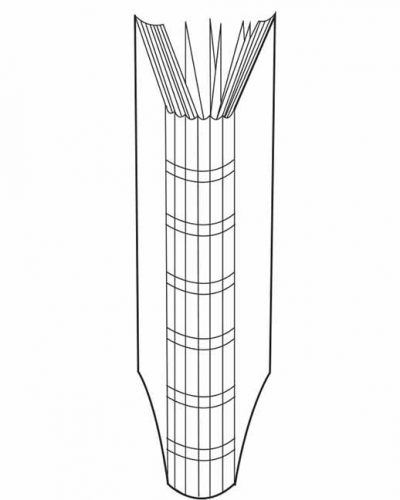
If you’ve chosen a saddle stitched notebook, your printed pages will now be folded in half and opened at the centre, turned over and pierced intermittently with wire to fix them together. Sewn bound notebooks go through a similar process to saddle stitched, but thread is used instead of wire, as the above example shows. Both methods are low cost and work well for notebooks with low page counts. They also allow the books to open flat.

Casebound (Hardcover)
If you’ve opted for a classic hardcover notebook, small groups of your printed and folded pages are sewn together using strong thread, which is then enveloped in a hardboard cover otherwise known as a case. Case bound notebooks are durable and can look very elegant. Various materials can also be used to cover the case.
Quality Assurance & Drying
Most printing facilities will have a Quality Assurance department responsible for inspecting all printed parent sheets during the press run, monitoring the final product for defects, and flagging any issues early on in order to deter waste.
The quality control team follows the standards set by the printing facility, who ultimately decides the quality the product is required to meet. These quality assurance experts will sign off on color, bindery, and press runs by testing your product at random, during different steps of the process.
The final step in the offset printing process is to dry out your bound books. As you see below, all printed books are compactly stacked on top of each other using that pressure to halt pages from warping. This step is especially crucial for hard cover books; due to the moisture added in gluing and lamination, these covers are prone to curving if there’s no pressure to keep them flat while they dry. Many printers will have a designated drying room with controlled temperature and humidity settings to ensure consistency in drying.
